At-Home Peels Bring Professional-Grade Glow
After your first at-home peel, the skin’s response depends heavily on the depth of the acid and your baseline sensitivity. A light formula with AHAs like glycolic or lactic acid typically produces mild redness, tightness, and light flaking for one to three days. Deeper formulas with BHAs such as salicylic acid may cause more noticeable peeling and a longer recovery window. The American Academy of Dermatology notes that the result is smoother, more even-toned skin, but only when you follow the product's instructions and patch test first.
Immediately after rinsing the peel, expect a warm, sunburn-like sensation that usually subsides within a few hours. Over the next 24 to 72 hours, the outer layer may feel rough, tight, or start to flake in small sheets. You might also notice temporary darkening or bronzing, which is normal and resolves as new cells surface. Avoid picking or pulling at peeling skin, as doing so can expose sensitive new skin and increase the risk of post-inflammatory hyperpigmentation, especially on deeper skin tones.
Redness, Flaking, and Sensitivity
Redness and flaking are the most common side effects and are part of the skin’s natural repair process. Professional peels used in dermatology offices may cause more pronounced exfoliation, but at-home products with lower concentrations are formulated for gradual renewal. As the outer layer sheds, your skin may feel dry, itchy, or slightly rough. Moisturizers and barrier-repair products help soothe the area, but avoid heavy oils or active ingredients like retinol, AHAs, and benzoyl peroxide for a few days.
How Long Will Peeling Last?
The duration of visible peeling depends on the peel’s strength and your skin’s turnover cycle, which ranges from 28 to 40 days in adults. For a light at-home peel, expect mild flaking for two to three days; medium-depth products may cause more noticeable shedding over four to five days. In rare cases of over-exfoliation, peeling can last longer and require additional care. If you experience severe discomfort, blistering, or prolonged irritation, stop use and consult a dermatologist, as outlined in this Cleveland Clinic guide on at-home chemical peels.
Following the peeling phase, your skin may appear brighter and smoother, but it remains more sensitive to sun and environmental stress. Sunscreen is non-negotiable during this period, as new skin cells are more prone to damage. For professional-grade results without the guesswork, consider consulting a dermatologist. On The Spot Dermatology in Glenview, Illinois, offers customized treatment plans and can guide you on when an at-home peel is appropriate versus when an in-office chemical peel would be more effective.
Understanding Safe Acid Strengths for Home Use
 A handful of over-the-counter peels now deliver professional-caliber ingredients, but the difference between a smart at-home peel and a damaged skin barrier comes down to concentration. Dermatologists recommend keeping acids below 10% when you are working at home, since higher percentages are reserved for licensed professionals who can neutralize the solution and monitor your skin's reaction.
Glycolic acid. The gold standard for brightening and smoothing fine lines, glycolic acid works best at 5% to 10% for at-home use. At 10% it penetrates the upper layers of skin to lift away dead cells and stimulate collagen, yet remains gentle enough for weekly application.
Lactic acid. Lactic acid is the hydrating member of the alpha-hydroxy acid family. It exfoliates while drawing moisture into the skin, making it a good choice for dry or sensitive complexions. Safe home concentrations typically range from 5% to 10%.
Salicylic acid. A beta-hydroxy acid that dissolves oil inside the pore, salicylic acid is ideal for acne-prone skin. At-home products usually contain 0.5% to 2%, which is effective for blackheads and breakouts without causing excessive irritation.
Mandelic acid. Because its larger molecular size slows penetration, mandelic acid is one of the gentlest exfoliants available. It suits darker skin tones and sensitive skin, with home formulations typically ranging from 5% to 10%.
These are the same concentration ranges Ots Dermatology highlights in its guide to professional versus at-home skin care. Over-the-counter peels may use glycolic acid at around 10%, while professional peels can contain up to 70% — a jump that demands the supervision of a trained dermatologist to apply, neutralize, and monitor the peel for complications.
Before you begin any at-home peel, check with a dermatologist to assess your skin type and condition. Certain skin tones, active infections, or recent sun exposure may make a chemical peel riskier. A quick consultation helps you pick the right acid and strength for your needs while avoiding unnecessary side effects.
Professional peels use significantly stronger acids and deeper penetration techniques, as explained in this breakdown of in-office procedures. When you choose an at-home product, you trade a bit of potency for convenience and lower cost, but you gain the ability to maintain results between professional visits.
How to Choose a Peel for Sensitive Skin
 After an at-home peel, your skin goes through a predictable healing arc. The visible peeling typically starts around day two or three, and the outermost layer finishes shedding by day seven. That is when you first see the fresh, brighter skin underneath, but the glow you are after keeps building for weeks as new collagen forms.
The First Week: Shedding and Renewal
Day one brings mild redness and a slight tightening sensation, which is a normal sign the acid is working. By day two to three, dry patches and flaking appear, and this is the phase that tempts most people to pick. Leave the skin alone. Picking can pull off skin that is not ready and lead to scarring or patchy color. Instead, use a gentle cleanser and a fragrance-free moisturizer, and apply sunscreen every morning because new skin is more sensitive to UV damage.
By the end of the first week, most of the visible peeling is done. This is the point where you notice a smoother texture and a more even tone, but the deeper benefits are still ahead.
The First Month: Collagen Production Kicks In
Over the next two to four weeks, the peel continues to stimulate collagen and elastin below the surface. While you may not see dramatic peeling during this time, the skin is actively rebuilding. Fine lines look softer, and sun spots or post-acne marks appear less prominent. For mild issues like dullness or light discoloration, results can last for months. For deeper concerns, a single peel may only spark the process, which is why consistency matters more than intensity.
How Often Can You Peel?
Professional in-office peels are often repeated every four to six weeks to match the skin's natural cell turnover cycle. At-home peels, which use lower concentrations like the 10% to 20% acids found in many retail formulas, can be done more frequently, but listening to your skin is the best guide. If you experience prolonged redness, stinging, or breakouts, give your barrier more time to recover before your next treatment.
| Timeline | What Happens | What You See |
|---|---|---|
| Day 1 | Mild redness, tightness | Subtle glow |
| Days 2-3 | Dryness, flaking | Dull, rough texture |
| Days 4-7 | Peeling slows | Smoother skin emerges |
| Weeks 2-4 | Collagen production | Fine lines soften |
| Months | Cumulative benefits | Brighter, even tone |
Getting the Most From Your Peels
To keep results going, pair your peel with a consistent routine that includes gentle cleansing, daily SPF, and moisturizing. Professional chemical peels can use acids up to 70% for deeper penetration, while at-home options stay milder for safety. If your skin is sensitive, gentle AHAs like lactic and mandelic acid can deliver visible results with less irritation.
For those new to peels, always patch test first and follow the product's instructions. At-home peels are safe when used as directed, but over-exfoliation can compromise your barrier, so start slow and build up your tolerance.
Targeting Dark Spots and Hyperpigmentation
The safety and success of an at-home peel come down to choosing the right strength and formula for your skin. Professional chemical peels use up to 70% glycolic acid, while at-home products typically contain much lower concentrations, usually under 20% for AHA and under 30% for BHA. This distinction matters because higher-strength acids penetrate deeper and deliver faster results, but they also carry a higher risk of irritation and burns when used outside a clinical setting. Cleveland Clinic notes that even "light" professional peels are stronger than most at-home kits, which is why dermatologists recommend starting with the gentlest option.
Start by identifying your primary skin concern. If you want to fade dark spots and hyperpigmentation, AHAs like glycolic and lactic acid are the most effective choice because they exfoliate the surface layers where pigment accumulates. For acne-prone or oily skin, BHAs like salicylic acid penetrate into the pores to clear congestion and reduce breakouts. Combination skin often responds well to a gentle AHA/BHA blend, but it's best to patch test any new product on your jawline or inner arm 24 hours before applying it to your face.
At-Home vs. In-Office Peels: What's the Difference?
The key difference between at-home and in-office peels is concentration and control. At-home peels are formulated with lower percentages of active acids, usually between 5% and 20% for AHAs, making them safe for beginners when used as directed. In-office peels, performed by a dermatologist, use much higher concentrations that can reach deeper into the skin. This means professional peels deliver more dramatic results in fewer sessions, but they also require a recovery period and are best for patients with significant sun damage, deep wrinkles, or stubborn hyperpigmentation.
According to Mayo Clinic, the depth of a chemical peel depends on the type of acid, its concentration, and how long it stays on the skin. At-home peels are almost always "light" or "superficial" peels that only affect the outermost layer of the epidermis. While these can improve skin texture and tone, they won't address deep wrinkles, scars, or melasma the way a medium or deep peel can. For that reason, patients with more advanced concerns should consider scheduling a consultation at On The Spot Dermatology to explore professional options.
AHA Peels. Glycolic and lactic acid are the most common AHAs in at-home peels. They work by dissolving the bonds between dead skin cells, revealing brighter, smoother skin underneath. These are excellent for dullness, fine lines, and hyperpigmentation.
BHA Peels. Salicylic acid is the primary BHA used in at-home peels. It's oil-soluble, so it can penetrate into pores to remove excess sebum and reduce blackheads and breakouts. It's also anti-inflammatory, making it a good option for sensitive, acne-prone skin.
| Peel Type | Best For | At-Home Strength | In-Office Strength |
|---|---|---|---|
| AHA (Glycolic/Lactic) | Dullness, hyperpigmentation, fine lines | 5% - 20% | 20% - 70% |
| BHA (Salicylic) | Acne, blackheads, oily skin | 0.5% - 2% | 20% - 30% |
| Enzyme (Papaya/Pumpkin) | Sensitive skin, gentle exfoliation | Low concentration | Higher concentration |
For a comprehensive breakdown of how to incorporate chemical peels into your routine, The Benefits of Regular Chemical Peels for Rejuvenation offers guidance on professional options that deliver more dramatic results.
Regardless of whether you choose an at-home peel or an in-office treatment, always follow the product's instructions precisely. Leaving a peel on too long, applying it to broken skin, or combining it with other active ingredients like retinol can lead to chemical burns and hyperpigmentation. If you're new to chemical exfoliation, start with a once-weekly application and gradually increase frequency as your skin builds tolerance. For persistent dark spots or advanced signs of aging, On The Spot Dermatology offers personalized chemical peel treatments tailored to your skin type and concerns.
Top-Rated Peels for Every Skin Type
Selecting the right at-home chemical peel starts with an honest assessment of your skin type and concerns. Most dermatologists categorize peels by their depth and active ingredients. Light peels using alpha-hydroxy acids (AHAs) like glycolic or lactic acid are ideal for addressing dullness, fine lines, and mild discoloration. For those with oilier or more acne-prone skin, beta-hydroxy acids (BHAs) such as salicylic acid are effective at penetrating pores. Deeper peels containing higher concentrations of trichloroacetic acid (TCA) should be reserved for professional settings, as they carry greater risk of complications. According to the Cleveland Clinic, at-home products are generally limited to lower-strength formulas, ensuring that even beginners can exfoliate safely without causing damage.
Reading Ingredient Labels and Strength Percentages
Before purchasing, read the ingredient label carefully. Over-the-counter peels typically contain between 5% and 20% glycolic acid, while professional peels may go up to 70%. As noted in The Beginner's Guide to At-Home Chemical Peels, starting with the lowest percentage and building up tolerance is key. Look for formulas that specify the pH level; a pH below 3.5 can make even a low-strength peel more irritating. Avoid combining multiple acidic products (like retinol or vitamin C) on the same day you peel, as this increases sensitivity.
Customizing Based on Skin Type
Your skin type dictates which peel will work best. Dry or sensitive skin benefits from hydrating AHAs like lactic acid, which gently exfoliate while supporting moisture retention. Oily or combination skin responds well to salicylic acid peels, which help clear congested pores and control shine. For hyperpigmentation or sun damage, consider a peel with kojic acid or azelaic acid. The Vogue expert guide emphasizes that even those with darker skin tones can safely peel at home if they choose products with gentle ingredients and always use sunscreen afterward.
AHA peels. Ideal for dry, sun-damaged, or dull skin. Glycolic and lactic acid exfoliate the surface to reveal brighter, smoother skin.
BHA peels. Best for oily, acne-prone skin. Salicylic acid is oil-soluble, so it penetrates deep into pores to reduce blackheads and breakouts.
Enzyme peels. Gentle options derived from fruit (papaya, pineapple) that dissolve dead cells without harsh acids, suitable for very sensitive skin.
For a deeper comparison of treatment options, including how peels stack up against microneedling and HydraFacial, see our guide on effective chemical peel choices.
What to Expect and How to Apply
Understanding the two main types of at-home chemical peels helps you pick the right one for your skin and use it safely. Self-neutralizing peels, often formulated with a blend of mild acids, stop working on their own after a set time and don't require you to rinse with a neutralizing agent. Wash-off peels, by contrast, need you to rinse your face with water after a few minutes to halt the exfoliating action. Knowing which type you're using is the first step to avoiding over-exfoliation.
Application Tips for Safe Results
Before applying any peel, cleanse your face thoroughly and dry it completely. Apply a thin, even layer of the solution, avoiding the eye area, nostrils, and any broken skin. For self-neutralizing formulas, follow the manufacturer's timing exactly, since leaving them on too long can cause irritation. For wash-off peels, rinse with cool water at the first sign of strong stinging or according to the instructions. Always do a patch test on your inner arm 24 hours before your first full application, as recommended by dermatologists at the Cleveland Clinic.
For beginners, start with a gentle formula and build up tolerance. If you have sensitive skin or are new to acid exfoliation, consider consulting a dermatologist first. Professional-grade peels, like those offered at On The Spot Dermatology, use higher concentrations of acids than over-the-counter products, so they deliver deeper exfoliation and faster results, as explained in this guide. For most people, in-office peels are safer and more effective for addressing concerns like acne scars or deep wrinkles.
Aftercare: What to Do Post-Peel
After a chemical peel, your skin is more sensitive to the sun. Apply a broad-spectrum sunscreen with SPF 30 or higher daily, and avoid direct sun exposure for at least a week. Moisturize generously to help your skin barrier recover. You might notice peeling or flaking for a few days; resist the urge to pick at it, as this can lead to scarring or hyperpigmentation. The American Academy of Dermatology advises following a gentle skin care routine and avoiding retinoids or harsh scrubs until your skin fully heals.
If you experience severe burning, blistering, or prolonged redness, discontinue use and seek medical advice. At On The Spot Dermatology, our providers can recommend the right peel strength for your skin type and guide you on at-home versus in-office treatments. For a deeper, more controlled result, professional peels are often the safer choice, as highlighted in this comparison.
| Aspect | Self-Neutralizing Peel | Wash-Off Peel |
|---|---|---|
| Neutralization | Stops on its own after set time | Requires water rinse |
| Ease of use | Simpler for beginners | Needs precise timing |
| Risk of over-exfoliation | Lower if followed correctly | Higher if left too long |
| Typical acids | Mandelic, lactic, low-strength glycolic | Glycolic, salicylic, TCA |
| Suitability | Sensitive or dry skin | Oily, acne-prone, or normal skin |
Post-Peel Care: Soothe and Protect
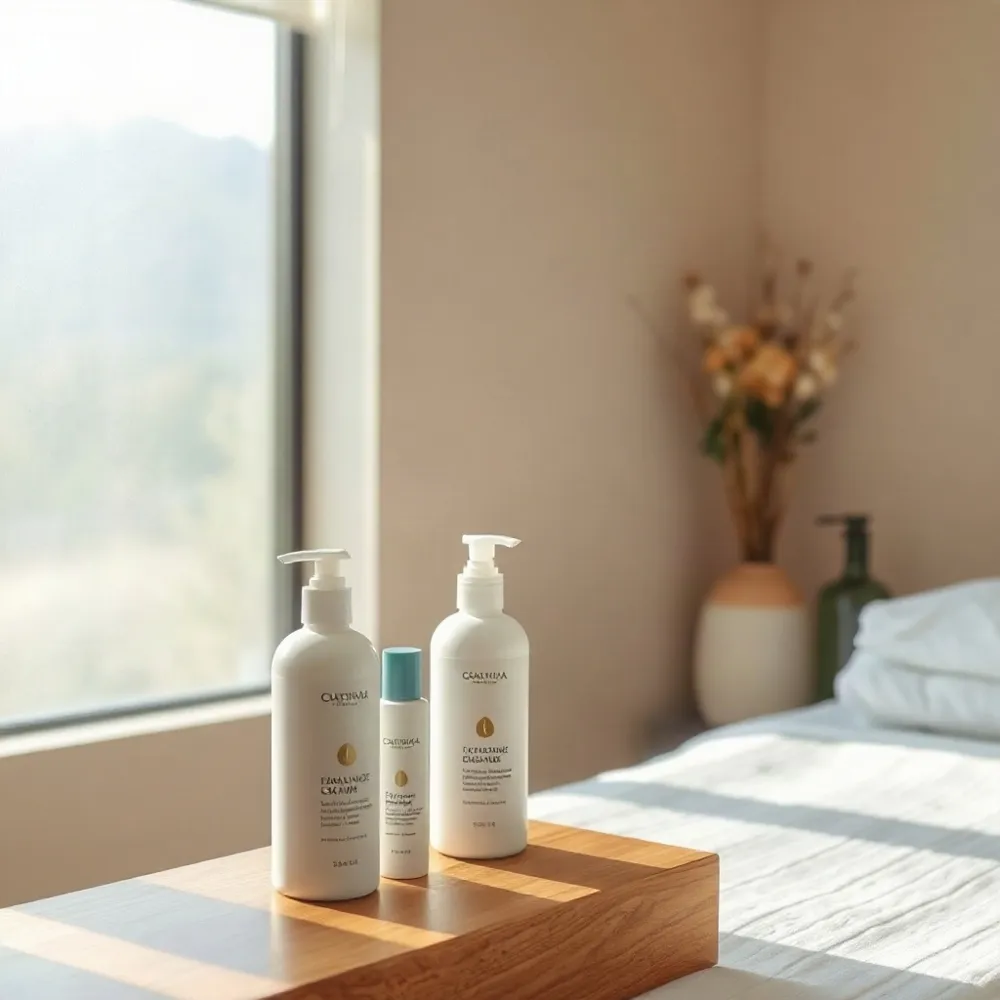 What you do in the days right after a chemical peel often matters more than the peel itself. The outer layers of your skin are freshly renewed and temporarily more vulnerable, which means the wrong moisturizer, the wrong cleanser, or a missed sunscreen application can undo the glow you were aiming for. The goal is simple: calm the skin, keep the moisture barrier intact, and shield the new skin from anything that could irritate it.
Apply a Gentle, Fragrance-Free Moisturizer
After peeling begins, your skin's natural barrier is working hard to repair itself. A thick, fragrance-free moisturizer helps lock in hydration and reduces the tight, flaky feeling that often follows a peel. Look for ingredients like ceramides, squalane, and hyaluronic acid, which support barrier recovery without clogging pores. Skip anything with retinol, alpha hydroxy acids, or vitamin C until your skin has fully calmed down.
Sunscreen Is Non-Negotiable
Freshly peeled skin is far more sensitive to UV radiation, and skipping SPF increases the risk of hyperpigmentation and uneven tone. Use a broad-spectrum sunscreen with SPF 30 or higher every morning, even on cloudy days, and reapply every two hours if you are outdoors. A gentle, moisturizing sunscreen not only protects your investment but also helps the results last longer.
Keep It Simple While You Heal
During the peeling phase, resist the urge to exfoliate, pick, or use active treatments. Let the dead skin shed naturally to avoid scarring or irritation. Your routine should consist of a mild cleanser, a barrier-repairing moisturizer, and sunscreen until the skin feels back to normal. For those who want to maintain results between professional peels, an at-home routine with gentle, hydrating products can extend the glow without overloading your skin.
At On The Spot Dermatology, we recommend scheduling a follow-up if you experience severe pain, blistering, or unusual discoloration after a peel. Every skin type heals differently, and a professional can adjust your aftercare plan to protect your results and your skin's long-term health.
Expert-Approved Options and Professional Advice
With so many formulas on the market, selecting a safe at-home chemical peel comes down to matching the product to your skin type and experience level. Beginners should start with gentle alpha-hydroxy acid (AHA) or beta-hydroxy acid (BHA) formulas at low concentrations, while those with more resilient skin can gradually work up to stronger blends. A dermatologist can help you identify which acids suit your concerns, as outlined in this guide to effective skincare ingredients.
Key Ingredients to Look For
Glycolic acid, a type of AHA, is a popular choice for improving texture and tone. Lactic acid is gentler and more hydrating, making it ideal for dry or sensitive skin. Salicylic acid, a BHA, penetrates oily pores to address blackheads and breakouts. For best results, choose a product with a pH between 3 and 4, which optimizes efficacy while minimizing irritation. At-home peels typically contain lower concentrations than professional formulas, so they are safer for regular use.
Patch Testing and Spot Testing
Before applying any new peel to your face, perform a patch test on a small area of skin, such as behind your ear or on your inner forearm. This helps you gauge your tolerance and avoid an allergic reaction. For a more reliable assessment, some experts recommend testing on your jawline to see how the product reacts with your facial skin. Dermatologists advise that you wait 24 hours after a patch test and discontinue use if you experience severe redness, burning, or swelling.
Start Slow and Follow Instructions
When beginning a new peel, apply it no more than once or twice a week, depending on the product's strength and your skin's tolerance. Always follow the manufacturer's instructions, including how long to leave the peel on and how often to use it. Over-exfoliating can compromise your skin barrier, leading to dryness, redness, and increased sensitivity. If you are new to chemical peels, consider scheduling a consultation with a professional to learn which ingredients and concentrations are right for you, as discussed in this comparison of at-home and in-office treatments.
Sun Protection Is Non-Negotiable
Chemical peels increase your skin's sensitivity to ultraviolet (UV) radiation, making daily sun protection essential. Wear a broad-spectrum sunscreen with at least SPF 30, reapply every two hours when outdoors, and seek shade during peak sun hours. This step prevents hyperpigmentation and other damage that could counteract the benefits of your peel. According to the American Academy of Dermatology, consistent sunscreen use is key to maintaining results.
When to Avoid At-Home Peels
Skip at-home peels if you have active cold sores, open wounds, or a sunburn. Avoid them if you are pregnant or nursing, unless cleared by your doctor. Those with darker skin tones should be cautious with stronger acids, as they can cause post-inflammatory hyperpigmentation. If you have a history of keloids or sensitive skin, consult a dermatologist before starting any peel regimen. For a thorough overview of who should avoid certain ingredients, this resource offers guidance.
| Ingredient | Type | Best For |
|---|---|---|
| Glycolic acid | AHA | Fine lines, texture |
| Lactic acid | AHA | Dry, sensitive skin |
| Salicylic acid | BHA | Oily, acne-prone skin |
Avoid These Common Peel Mistakes
Getting a professional-grade glow from an at-home chemical peel comes down to preparation, timing, and aftercare. Start by checking the strength of your peel: lighter formulas with 10% to 20% glycolic acid are well suited to beginners, while deeper options demand caution. According to the experts at Cleveland Clinic, at-home peels are safe when you follow the instructions and patch test first.
Patch testing is non-negotiable. Apply a small amount of the peel solution behind your ear or along your jawline, then wait 24 to 48 hours to see how your skin reacts. This simple step can prevent irritation, redness, or a surprise reaction on your face. The American Academy of Dermatology also recommends testing any new product this way before full application.
Prep Your Skin the Right Way
Before applying a peel, gently cleanse your face and pat it dry. Avoid using retinoids, exfoliating acids, or other active ingredients for a few days beforehand, as they can increase sensitivity. This step helps the peel work evenly and reduces the risk of over-exfoliation.
- Wash your face with a mild, non-abrasive cleanser
- Dry your skin thoroughly; moisture can alter the peel's absorption
- Apply a thin layer of petroleum jelly to sensitive areas like the corners of your nose and mouth
- Wait until the day after the peel to start your regular moisturizer
Always follow the manufacturer's directions on how long to leave the peel on. Starting with shorter application times lets your skin build tolerance. If you experience burning or stinging that feels intense, rinse it off immediately with cool water.
Post-Peel Care: The Key to That Glow
After a peel, your skin is more sensitive to the sun, so a broad-spectrum sunscreen with at least SPF 30 is essential every morning. Keep your routine simple: a gentle cleanser and a fragrance-free moisturizer help maintain that fresh, dewy look. Avoid picking at any peeling skin, as this can lead to scarring or dark spots.
For those new to at-home peels, starting with a lighter concentration and gradually increasing strength can help you achieve that professional-looking radiance at home. If you have sensitive skin or are unsure about which peel to choose, a consultation with a dermatologist can provide personalized guidance. At On The Spot Dermatology, we specialize in medical and cosmetic skin treatments, and we can help you pick the right peel for your skin type.
How Often Should You Use At-Home Peels?
Figuring out the right frequency for at-home peels comes down to your skin type, the peel's strength, and how your skin responds. A common starting point is once a week, and that's a sensible, conservative baseline. From there, you can gradually increase to twice a week if your skin tolerates it without irritation. The key is to let your skin build tolerance rather than pushing it too hard, too fast.
Start by choosing a mild formula with a low concentration of AHAs or BHAs, like 5% to 10% glycolic acid. Apply it once a week for two to four weeks. Watch for signs of over-exfoliation: redness, stinging, flaking, or breakouts that don't settle within a day or two. If your skin stays calm, you can move to twice a week. If you notice any sensitivity, drop back to once a week or even every ten days. Cleveland Clinic notes that the concentration and frequency of at-home peels are far lower than what you'd get in a professional setting, which is why starting slow matters.
Adjusting for Skin Type and Peel Strength
Your skin type plays a big role in how often you can peel. Oily, thicker skin can often handle peels twice a week. Dry or sensitive skin may only manage one peel every ten days to two weeks. Likewise, the type of acid matters. Glycolic acid, a water-soluble AHA, penetrates more deeply and may be too harsh for daily or even twice-weekly use on sensitive skin. Lactic acid is gentler, and salicylic acid is ideal for acne-prone skin. Always match the peel to your skin's tolerance, not just the trend.
If you're also using retinoids, prescription acne treatments, or other exfoliating actives, be extra cautious. These products already increase cell turnover, and layering a peel on top can over-strip your skin. A good rule is to alternate nights: use your peel one night, and your retinol the next, with at least one rest night in between. Mayo Clinic emphasizes that the strength of the acid and your skin's condition determine how long you can leave a peel on, so always follow the product's instructions.
What Happens if You Over-Peel?
Over-peeling is a real risk, especially when you're eager to see results. Symptoms include excessive flaking, tightness, burning, swelling, or the formation of crusts. In severe cases, you could develop post-inflammatory hyperpigmentation or even scarring. Healthline warns that using a peel too often, or at too high a concentration, can damage your skin barrier and lead to long-term sensitivity. If you suspect you've overdone it, stop all active ingredients, switch to a gentle cleanser and rich moisturizer, and apply a broad-spectrum sunscreen daily. Give your skin a week or two to recover before resuming any peel.
| Skin Type | Starting Frequency | Max Frequency |
|---|---|---|
| Oily / thick | 1x / week | 2x / week |
| Normal | 1x / week | 2x / week |
| Dry / sensitive | 1x / 10 days | 1x / week |
| Acne-prone | 1x / week | 2x / week |
The Right Way to Layer and Protect
When you do use a peel, prep your skin first. Wash with a gentle, non-foaming cleanser and pat dry. Apply a thin, even layer of the peel, avoiding the eye area, lips, and any broken skin. Leave it on for the exact time specified, usually 3 to 10 minutes, then rinse with cool water. Afterward, skip other active ingredients for the night and apply a soothing moisturizer or a hydrating serum. The next morning, always wear a mineral-based sunscreen with SPF 30 or higher. Peels make your skin more photosensitive, so sun protection is non-negotiable.
For a personalized routine, consider alternating between a gentle enzyme mask and a chemical peel, or use a hydrating peel like lactic acid if you have dry skin. You can also pair your peel with a barrier-supporting product containing ceramides or niacinamide to minimize irritation. If you're new to peels, start with a product labeled for beginners, like a 10% glycolic acid pad, and work your way up. Allure offers a step-by-step guide on how to apply an at-home peel safely, which is worth reviewing before your first try.
Listen to Your Skin, Not the Calendar
Ultimately, the best schedule is the one your skin tolerates. Pay attention to how your skin feels the day after a peel. A mild tingling that fades quickly is normal. If you feel tight, itchy, or see visible flaking, you've pushed too far. Back off for a week and let your barrier recover. Vogue highlights that even experts stress starting slow and adjusting based on your skin's response. Your skin will tell you when it's ready for more.
If you're ever unsure, or if you have conditions like eczema, rosacea, or active breakouts, check with a dermatologist before starting at-home peels. A professional can recommend the right strength and frequency for your skin, and can also suggest in-office options that deliver faster results with fewer sessions. On The Spot Dermatology offers both medical and cosmetic treatments, so you can get a plan tailored to your needs, whether that's at-home care, professional peels, or a combination of both.
Glow Confidently with the Right Peel
At-home chemical peels offer a convenient way to improve skin texture, evening out tone and revealing a healthy glow without a trip to the dermatologist's office. The gentler formulations found in consumer products allow you to incorporate exfoliation into your regular routine, as long as you stay within safe concentration ranges.
Prioritizing skin health means choosing products with acids matched to your skin type. For oily or acne‑prone skin, salicylic acid at 2% or less is effective, while normal to dry skin responds well to alpha‑hydroxy acids like glycolic and lactic acid at 10% or below. The Cosmetic Ingredient Review Expert Panel recommends that consumer products keep AHA concentrations at 10% or less with a pH of 3.5 or higher to minimize irritation.
When uncertainty remains, consulting a dermatologist provides personalized guidance. Practitioners like those at On Spot Dermatology in Glenview, Illinois, can review your skin type, medical history, and goals to recommend an appropriate peel strength and frequency. This step is especially valuable for individuals with darker skin tones, a history of cold sores, or those using prescription retinoids.